Thoracic Spondylitis
We Give You The Best ! Services THat You Can Trust

We Give You The Best ! Services THat You Can Trust
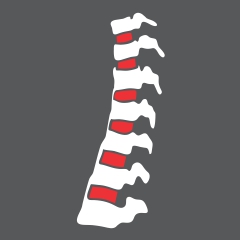
The thoracic region of the spine is made up of 12 vertebrae which are designated as T1 through T12 the threat 6 vertebrae are joined by reps to form your rib cage. A typical forensic vertebra consists of a body and a vertebral arch which has several processes for articular and muscular attachments. The intervertebral discs between the vertebrae in the thoracic region of the spine are not as thick as those found in other spinal regions but they act as shock absorbers. Thoracic spondylitis is a degenerative condition of the thoracic region of the spine this pathological condition can include facet joint osteoarthritis formation of bone spurs or disc herniation. Thoracic spondylitis does not occur as often as cervical or lumbar spondylosis commonly it happens in people over the age of 50.
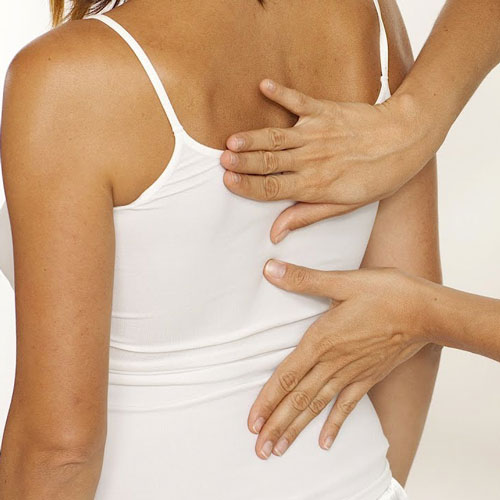
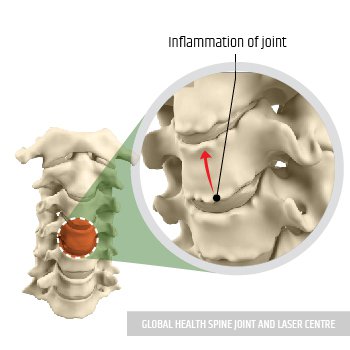
The patient complains of nonspecific back pain with localized tenderness. On radiographic examination, the disc degeneration is obvious, as seen in the loss of height and the bulging of the annulus beyond the vertebral margins.
Treatment Time : 2 Month
Sesssion Required : 10
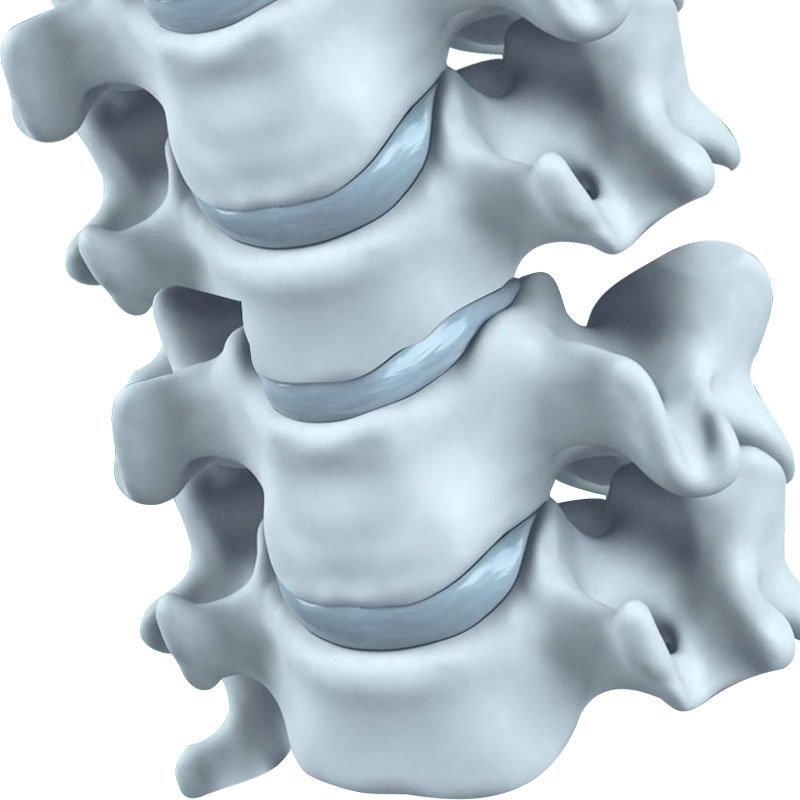
Fibrosis of the facet joints occurs, along with even greater disc degeneration and osteophyte formation. Osteophytes form along the edges of the facet joints, leading to enlarged facets. Lateral nerve root entrapment becomes more common in this stage, leading to radicular signs and lateral stenosis in the intervertebral foramen.
Treatment Time : 4 Month
Sesssion Required : 20

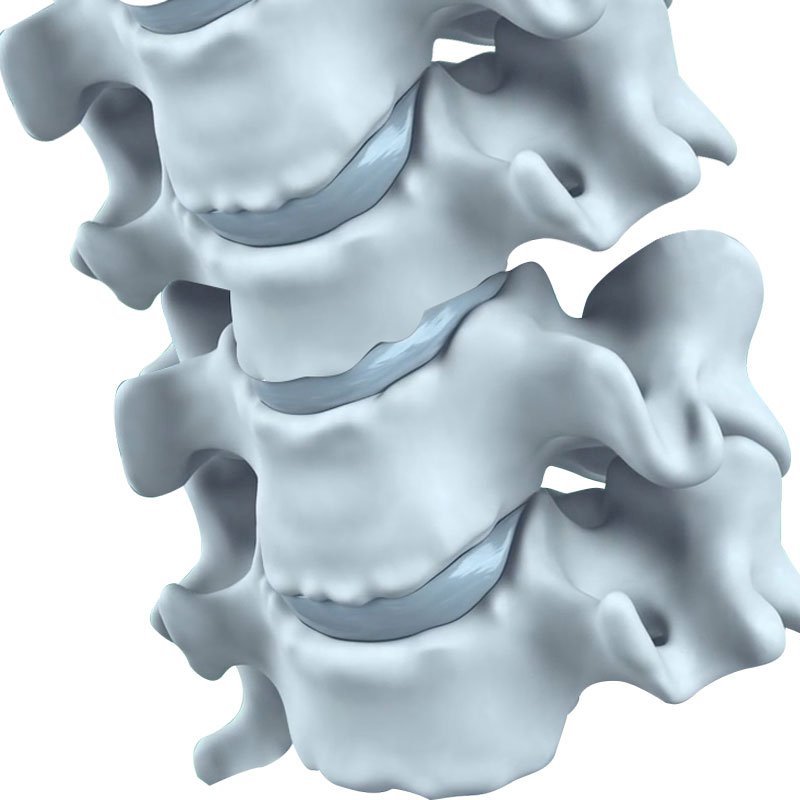
Fibrosis of the facet joints occurs, along with even greater disc degeneration and osteophyte formation. Osteophytes form along the edges of the facet joints, leading to enlarged facets. Lateral nerve root entrapment becomes more common in this stage, leading to radicular signs and lateral stenosis in the intervertebral foramen.
Treatment Time : 8 Month
Sesssion Required : 35
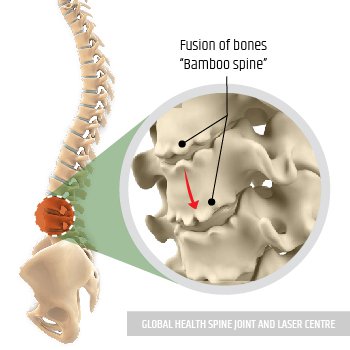
HLA-B27 PROTEIN developed Lumbar Spondylitis Stage 3.

Laser beam applied to the fused bone.
After Laser treatment, it started reduces the production of HLA-B27 Protein.

Healthy & the full range of motion of Spine
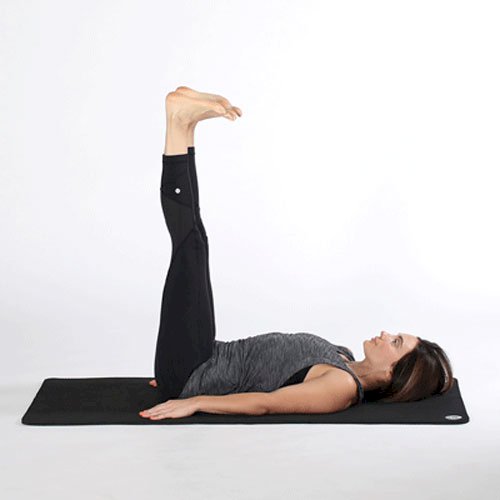
Step 1:Legs-Up-the-Wall Pose, or Viparita Karani in Sanskrit, is a restorative yoga posture that offers a wealth of benefits, making it a popular choice among people wishing to relax. It’s accessible to many people due to its ease and modifications options.
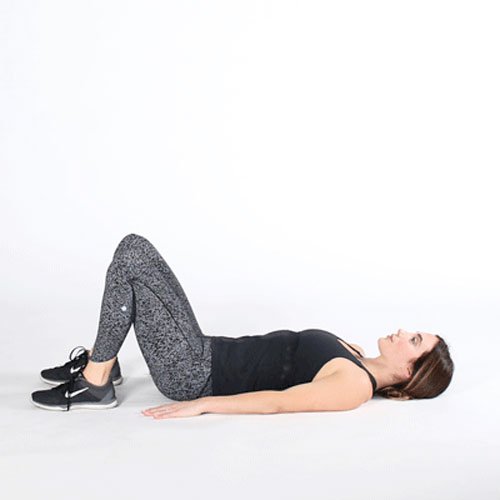
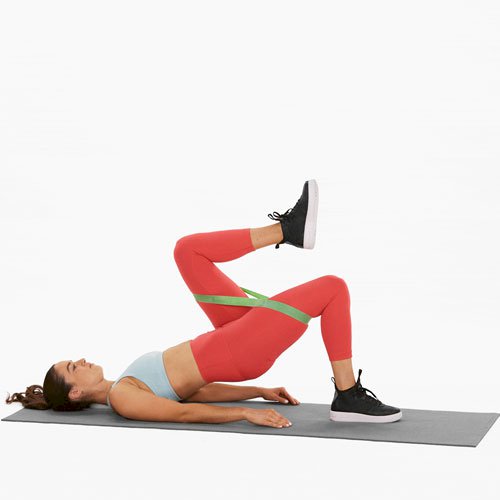
Step 1 : Lie on the ground and bend the knees, placing the feet flat on the floor hip-width apart. Press the feet into the floor, keeping the arms by the sides.
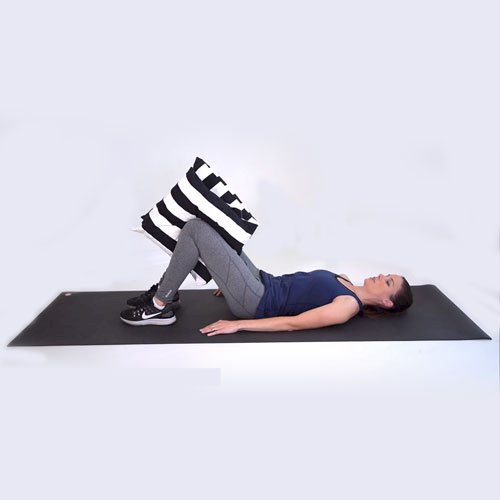
Step 2 : Raise the buttocks off the ground until the body forms a straight line from the shoulders to the knees. Squeeze the buttocks while keeping the shoulders on the floor.
Step 3 : Lower the buttocks to the ground and rest for a few seconds. Repeat 15 times, then rest for 1 minute. Do 3 sets of 15 repetitions.

Step 1 : Lie on your back in the hook lying position (knees bent and feet on the floor). Cross your hands and arms across your chest.
Step 2 : Slowly raise your head, neck, upper back, and shoulders off the floor. As you raise up, exhale.
Step 3 : As you lower down, inhale. Repeat 10 times and work up to 3 sets.
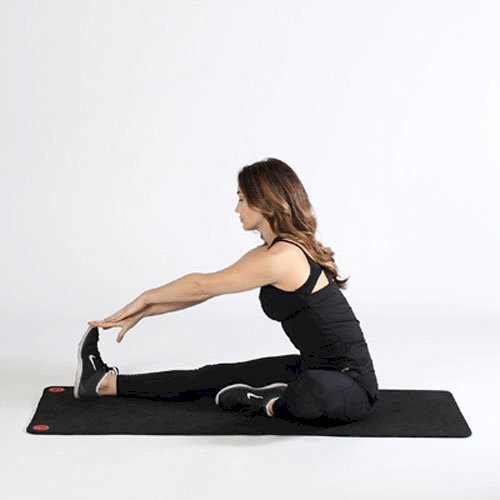
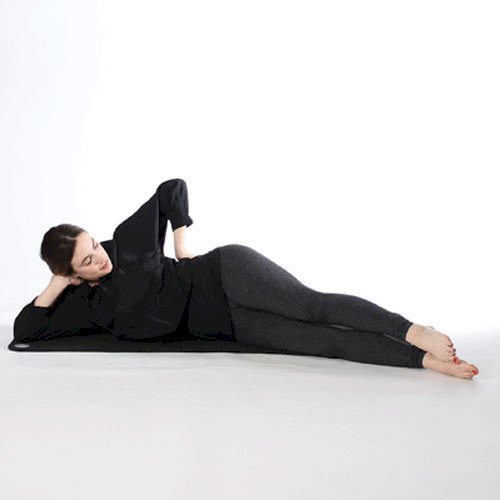
Step 1 : Sit with one leg extended and the other leg folded behind with your foot towards your glutes.
Step 2 : Fold over at the waist and reach for the shin or the foot.
Step 3 : Roll back up to the seated position. Repeat with the other leg.
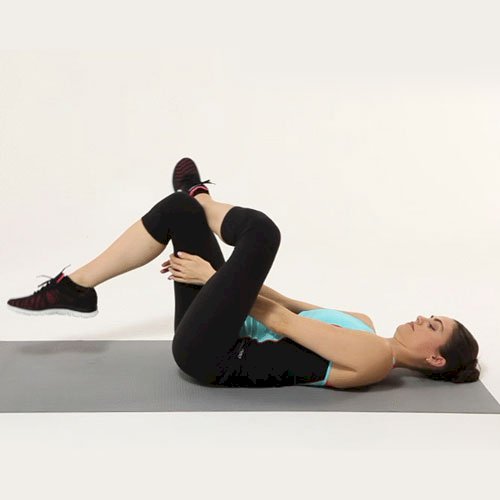
Step 1 : Start by laying on your back with your knees bent. Rest one ankle over the other leg, just above the knee.
Step 2 : Grab the thigh of the bottom leg and pull it toward your chest until you feel the stretch in your buttocks. It should not be painful.
Step 3 : Hold your leg for 15 to 30 seconds and release it. Repeat the exercise 3 times for each leg.
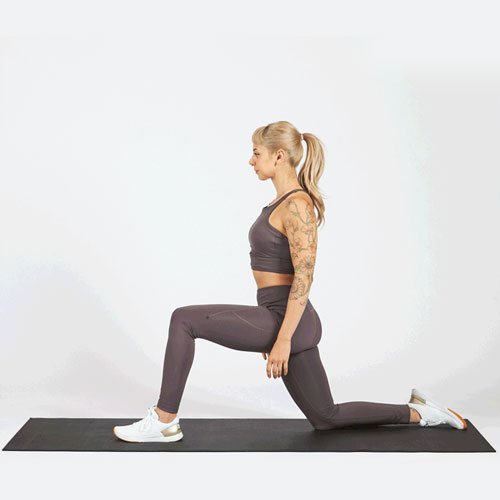
Step 1 : Begin in a half-kneeling position with your right leg in front and your left knee grounded.
Step 2 : Squeeze the glutes on the left side to help release the hip flexors on the left, shifting your weight slightly forward.
Step 3 : To add to this stretch, reach your left arm overhead and gently bend your torso toward the right. Hold for 45 seconds and repeat on the other side.
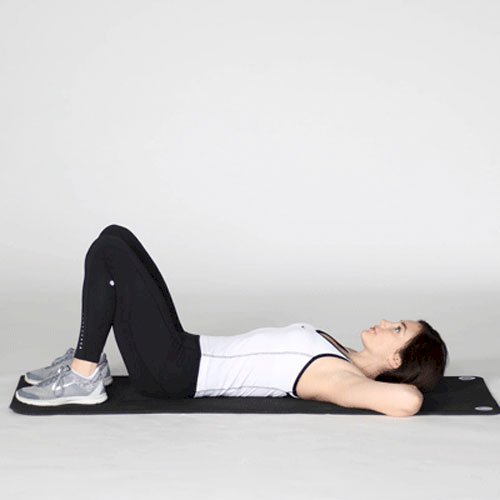
Step 1 : Lie on your back with your knees bent and feet flat on the floor.
Step 2 : Start by doing a pelvic tilt and raise your right foot 3 to 4 inches off the floor.
Step 3 : Gently lower your foot to the floor.
Step 4 : Repeat with your left foot. Do the exercise 5 times on each foot and up to 3 sets.
Step 1 : Lie on your back with your hips square and your legs laid out comfortably on the floor.
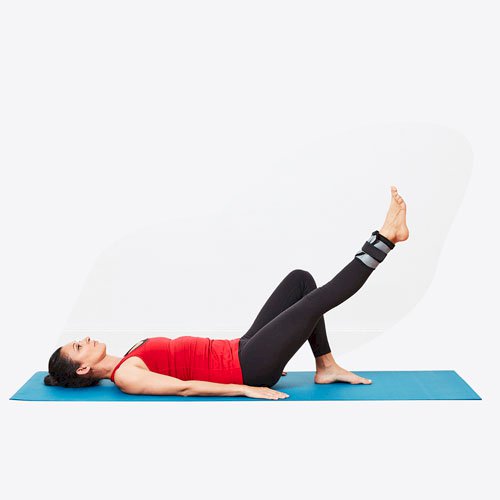
Step 2 : Bend the knee of your non-injured leg at a 90-degree angle, planting the foot flatly on the floor. Hold for three seconds. Relax and repeat 10 times more.
Step 1 : Lying on your side, use your free hand to find the groove in your back next to your spine. Activate your core by imagining that you’re moving your chest (don’t actually move your leg).
Step 2 : You should feel the multifidus muscles bulge under your fingers. Hold the pose for 3 seconds and relax. Repeat the exercise 10 times. Then lie on your other side and repeat the exercise another 10 times.
Step 1 : Lie on your back. As you breathe out, contract and engage your abdominal muscles.
Step 2 : Push your belly button toward the floor, and flatten your low back. Hold this position for 5 seconds. Relax. Repeat 10 times.
Step 1 : Lie on your back, both knees bent. Place a pillow between the knees.
Step 2 : Squeeze your knees together, squishing the pillow between them. Hold for 5 seconds. Do two sets of 10 repetitions.

Step 1 : Start on your hands and knees.
Step 2 : Raise one arm and the opposite leg straight out while tightening your core. Hold the position for 5 seconds.
Step 3 : Then lower your arm and leg back to the starting position.
Step 4 : Repeat the move with the opposite arm and leg.

Contains

Contains

Contains

Contains

Contains

Contains